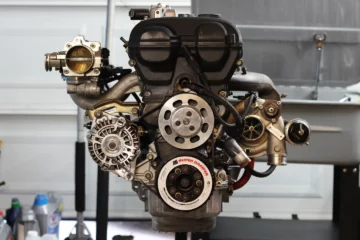
Time to hop back on the AED dyno once again and make some power! Below you’ll find an outline of the day, along with the dyno chart overlays that I found most interesting. If you’re looking for the exact build list of the powertrain you can find it here. Assembly video is here. Technical build vlog is here.
First 3 Pulls of the Day

These are the first 3 pulls of the day at just over 16psi and untuned/very conservative timing. The first 2 pulls had some misfires which you can see around 5500RPM (Blue) and 6200RPM (Green), so we gapped the spark pugs (NGK BKR8EIX) from 0.032″ (0.81mm) down to 0.022″ (0.56mm) to fix the problem. The orange run is really the true baseline for the day, 380whp/318wtq. Time to start pressing buttons on the laptop.
First Boost/Timing Adjustments

Orange is still our baseline run. On the red pull, boost was increased from 16.5 to 20psi. But wait, it made the same peak power? What gives? The engine entered a new part of the spark map, so timing was actually pulled from 16° down to 12°, completely offsetting the gains from the increased boost. So what happens when you feed the timing back in? The green pull happens. An increase of 27whp, and a timing bump from 12° to 15°. After the ignition advance increase, boost also dropped by 1/2psi down to 19.5psi, since advancing the timing keeps more heat in the cylinder and feeds less into the turbo. So green is our new best, at 19.5psi/15° (At peak HP). When you see a power jump like this from just 2-3° of spark advance, it’s showing that the engine is running much more efficiently. At a certain point your gains will diminish and you might get knock, so there is a limit to how far you can push it. Since I’m running E85, I push the ignition advance a lot farther than if I was running premium pump gas.
Fixing High RPM Boost Sag


Since dyno pulls repeat the same exact load over and over, I always tune with open loop boost control. I can get closed loop boost control figured out with some street tuning, so I don’t want to waste my valuable dyno time on that. A side effect of open loop boost control is that, since you need to manually set boost control duty cycle at all RPMs, and the controller is not targeting a specified boost pressure, you can easily end up with overboosting or boost sag at various RPMs. In my case, boost pressure was falling from 21.6psi at 5600RPM, down to 19.6psi at 7100. With open loop control, in order to fix this you would modify the duty cycle tables like in the example above. The best 2 pulls I have to demonstrate this were from a little later in the day: The blue and brown runs spool up exactly the same, make the same peak torque, but in the high RPM I was able to keep the boost flatter and picked up 19whp. Both of these runs have a peak boost of about 25psi, but the brown run tapers to 23.5psi by 7000, where the blue run maintains 25psi.
"I'll be fine with 450"

A little more boost, a little more timing, and this engine ran right up to 500’s front door. In the dyno video this run actually showed 501whp, but when I open the pulls on my computer sometimes they are 1-2hp off, I’m thinking it’s a correction factor thing. Anyways this run is at about 24.5psi and 19° at 7000RPM (Peak power).
VVT Tuning

For VVT tuning I turned off the boost controller and did the runs in 3rd gear instead of 4th, to be a little nicer to my engine. Pink run: VVT Advance at 25° for the entire pull. Blue run: VVT Advance at 0° for the entire pull. This essentially simulates using an adjustable cam gear and testing out 2 different settings, one which makes an additional 38wtq @ 4000rpm (at the marker) and another setting that makes an extra 23whp. But this is VVT, you can change the cam advance at any RPM and load to maximize torque, and the results will be the best of both worlds – check out the dyno below:

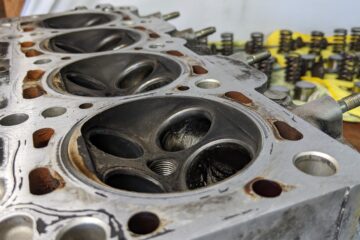
So what you want to do it run higher advance in the low RPM, and taper to 5° or 0° (every engine is different) in the high RPM. The green run is the result. You get to keep all that extra torque down low, and all of the power up top. Oh yeah and remember how I said the boost controller was turned off for these runs? This engine is making 384whp at just 14psi. High compression is crazy!
Final Results Of The Day

Here’s what the final results look like for the day. I didn’t think I’d get anywhere near 500 without having to push the engine uncomfortably hard, considering the size of the turbo. The dark blue run is after I turned it down just a bit in the interest in safety and longevity, I’ll probably run it closer to 475whp just to add to that margin, which is still incredibly fast, and I’ll feel good knowing there’s still another 50whp on the table and that I’m keeping the turbo nice and efficient, etc. I need to work on the boost control a bit in the midrange as I’d like to limit torque to 400ft-lbs as well. If I really need to, I can always set the tune to “kill” with the press of a couple buttons on my tablet.
High vs. Low Compression Peak Power Runs

One last thing I want to dive into is this overlay right here. So both my previous engine (1884cc, 9:1 compression) and the current engine (1929cc, 12:1 compression) made just over 520whp. And ss I’ve said before the major limitation on my setup is the size of the turbo, not the strength of the engine. This engine would do 600, 700hp+ with a bigger turbo and set of cams. But for my personal preferences and how I enjoy the car, it would be silly for me to do such a thing. The extra power would just be converted into wheelspin at any speed below 90mph (Even at 500 it’s very traction limited, on R-Comp 245’s), and below 4500RPM the car will just be dead inside. This is just a street car build, meant for all around fun. Autocross, HPDE, canyons, drag racing, highway pulls; it’s not perfect for anything but is kind of decent for everything. Just the way I want.


Where it gets interesting is that there are 2 points where the dynos of the 2 engines cross, meaning they were both making the same power at the same RPM. I think the charts speak for themselves, in showing the exact difference between the different compression ratios. What that means is I’m able to turn 500whp out of this engine with 16% less boost, so the turbo stays more efficient by operating closer to the center of the compressor map and intake temps stay cooler. (The turbo in this case is still very much on the right edge of the compressor map, just LESS so, with the reduced boost).